


Hatha Yoga: Lesson 1
Review the routine first.
When possible, practice Hatha Yoga in the morning on an empty stomach and after a bowel movement.
Use a blanket, thin mat or practice on some carpet. Use a yoga mat if you want.
Disclaimer: There are inherent risks in doing any form of stretching. Consult your doctor prior to practicing Hatha Yoga.
Yoga should be done with Love. When you love doing something, there is no effort involved. If there is effort, you have stopped loving.
Begin your Yoga lessons with a feeling of love and relaxation and continue your lessons as long as you feel that.
Music
Let the aum sound created by the sitar resonate deeply while intently focussing on the stretch.
Music by G SK
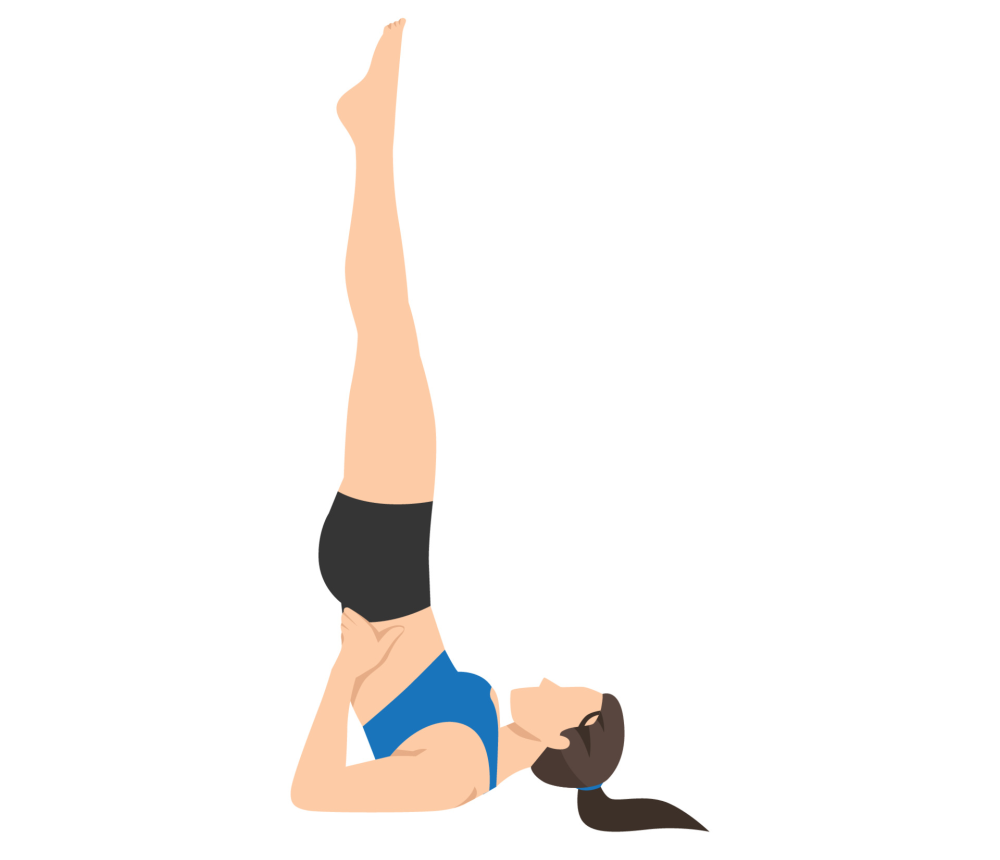
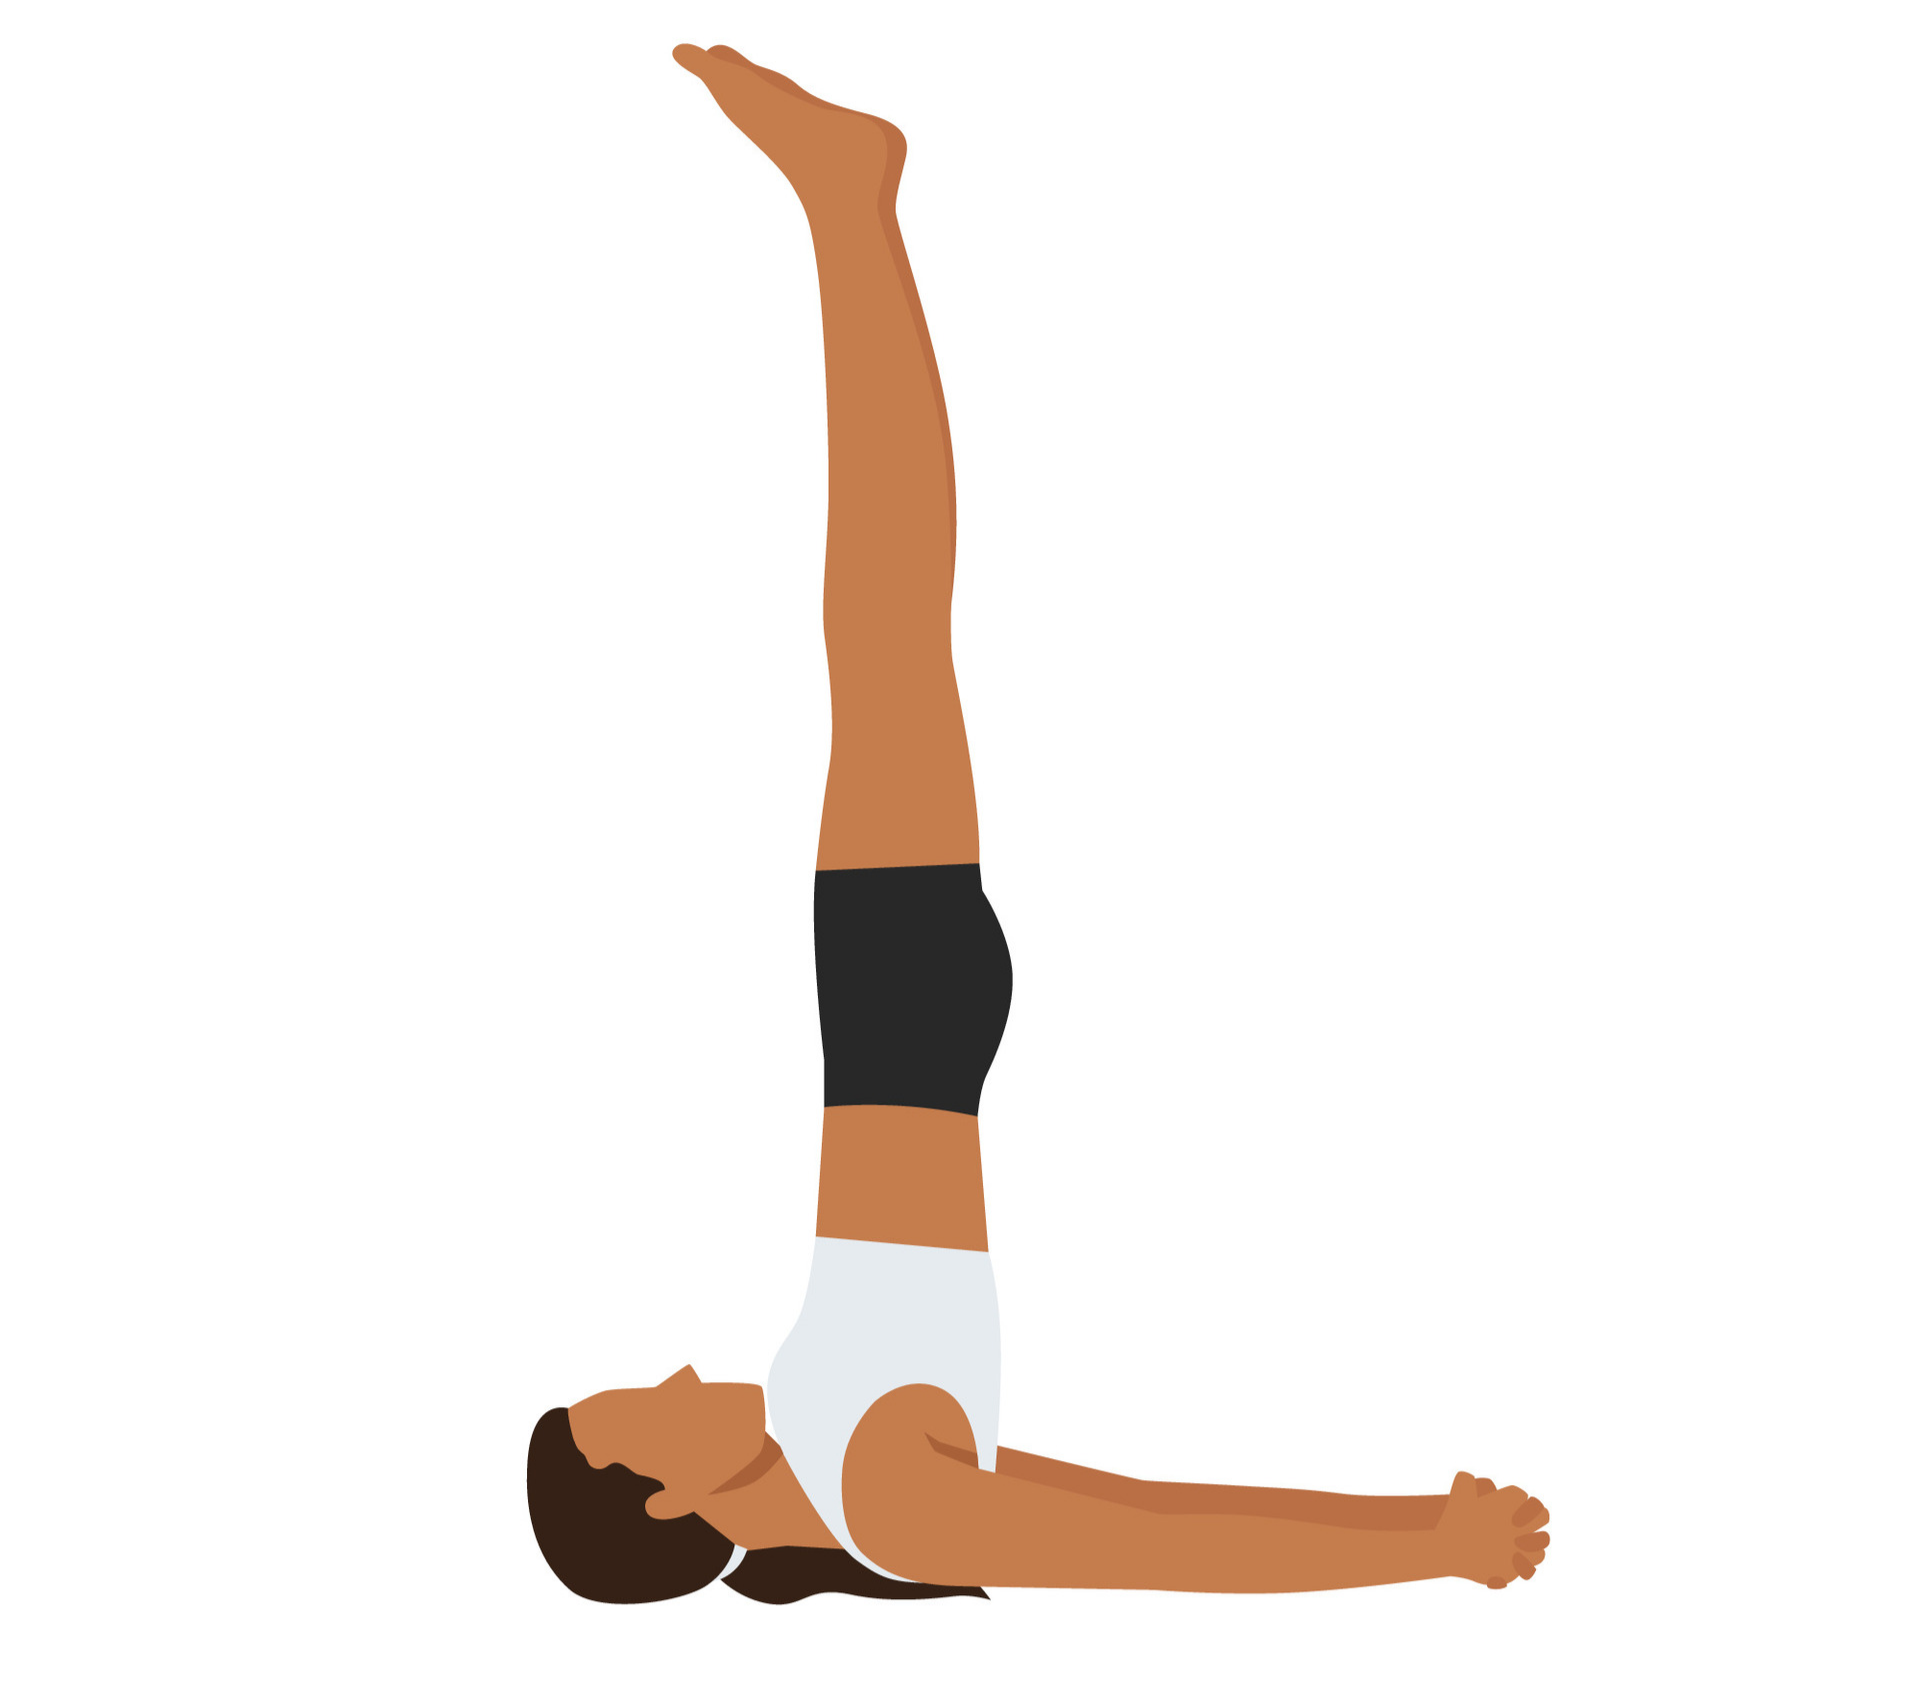
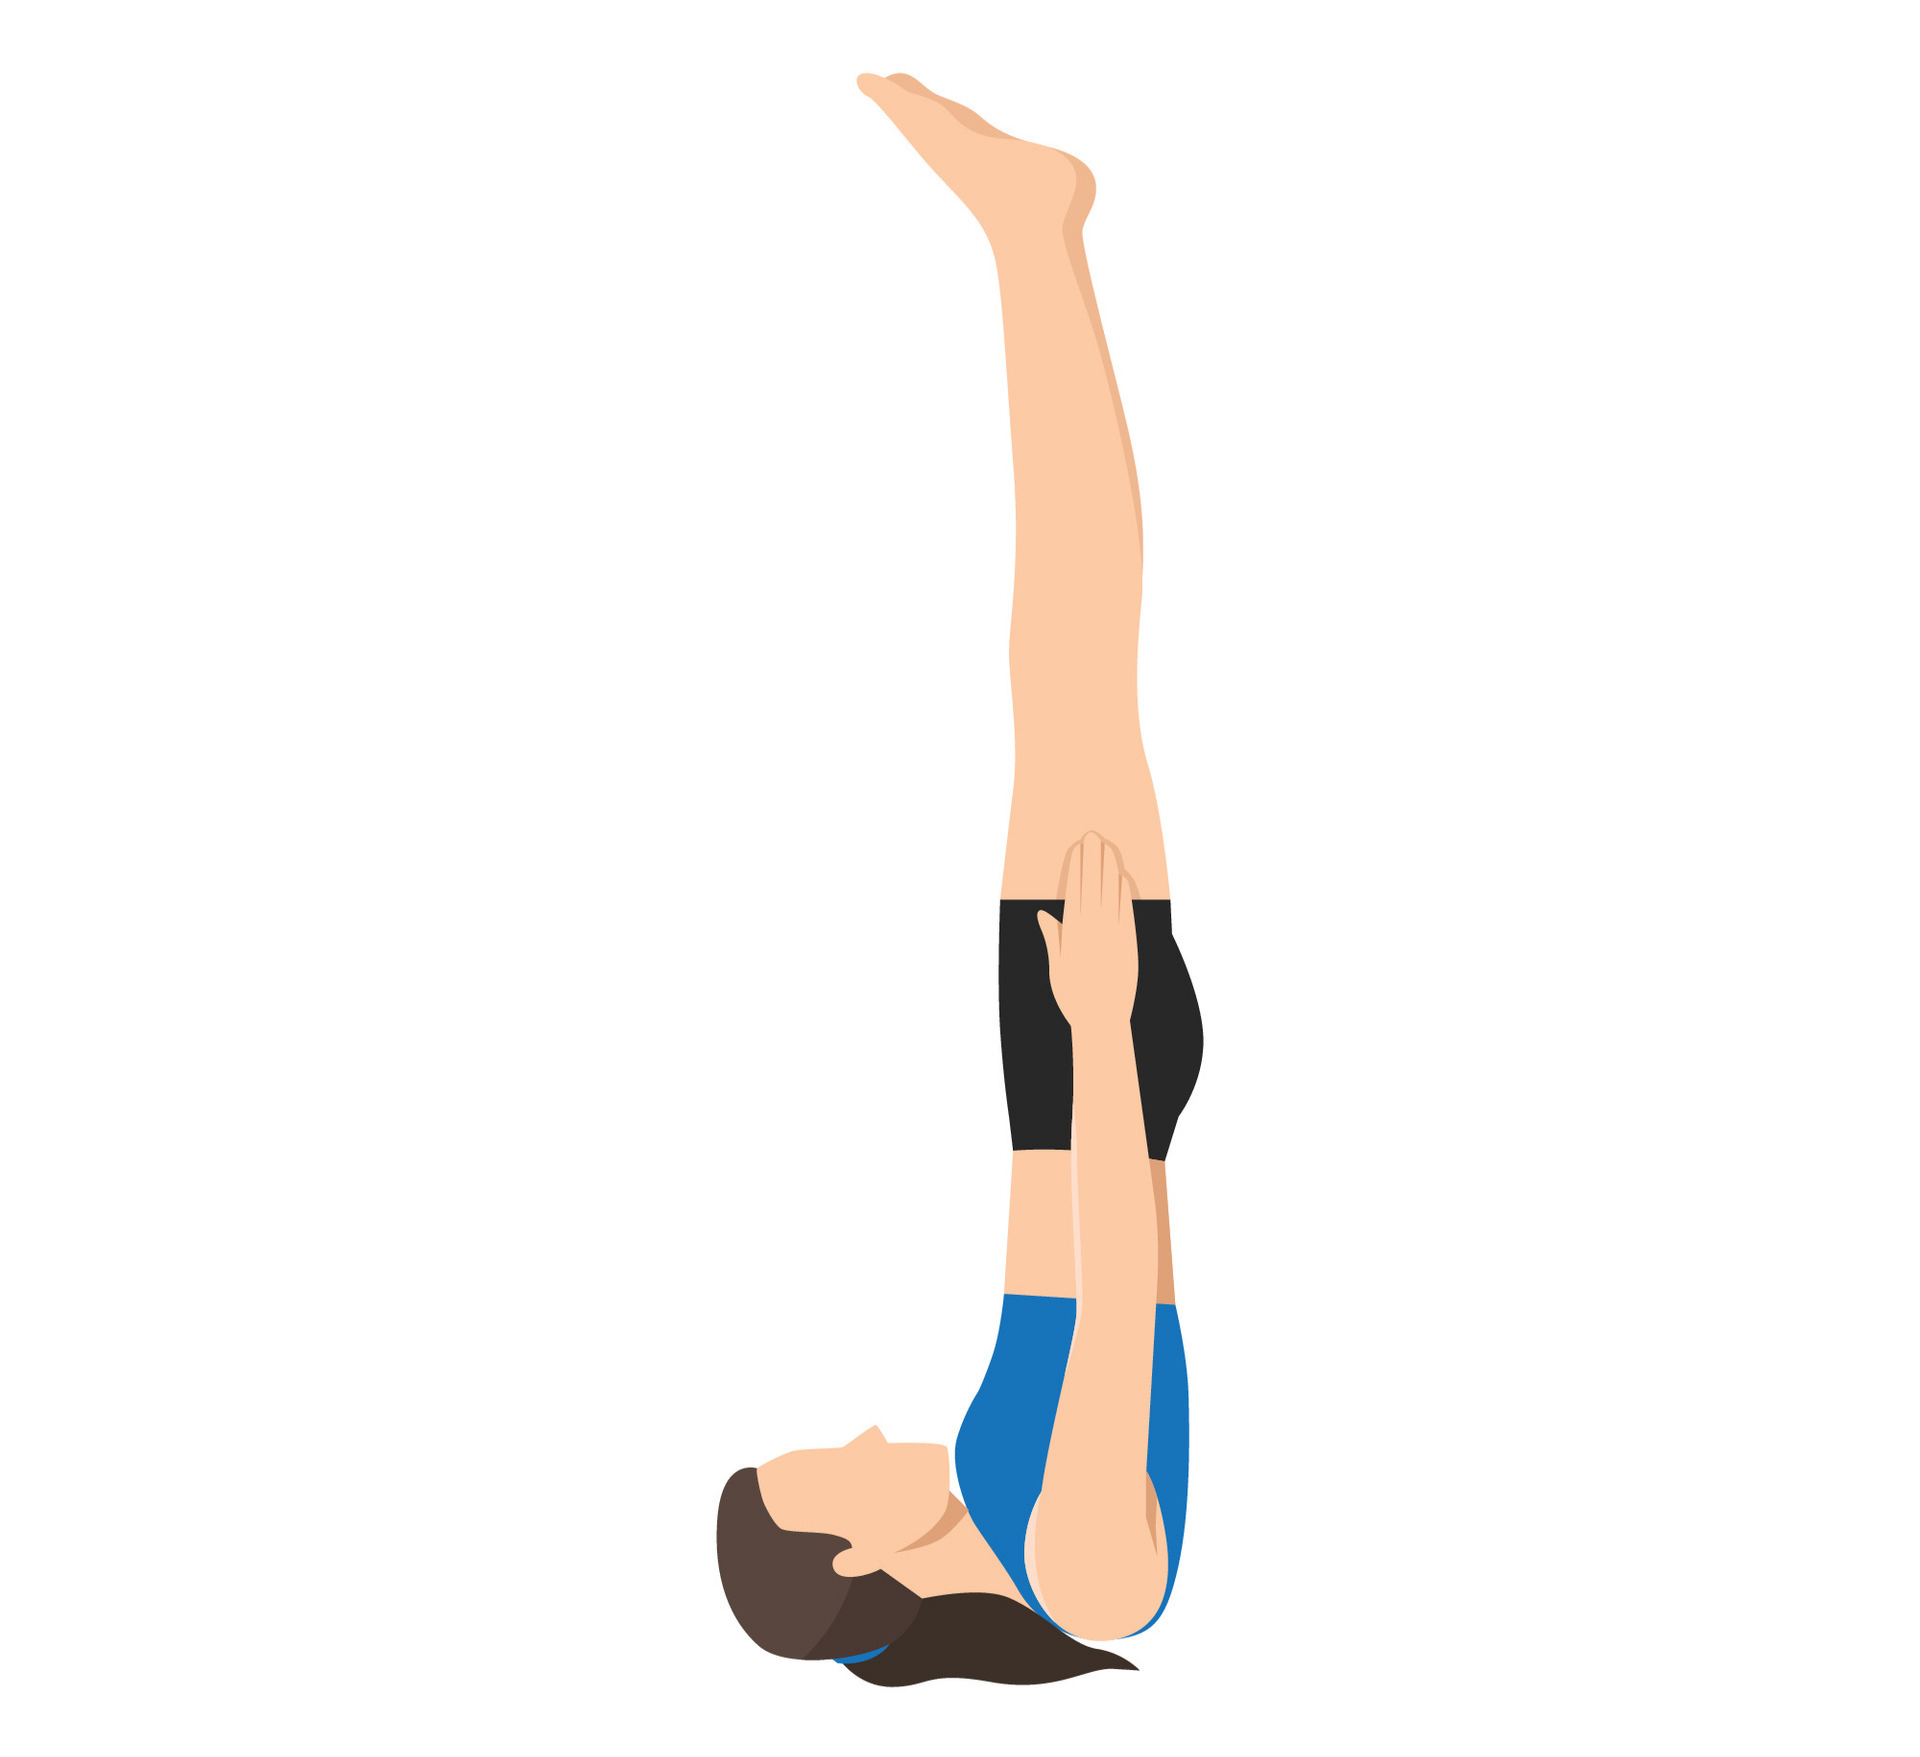
Pose 1: Sarvangasana
The Shoulder Stand
- Raise yourself up on to your shoulders with the help of your arms. Tuck your chin into your chest while doing shallow but regular breathing.
- Concentrate on the 5th chakra in the throat the thyroid and the parathyroid gland. Visualize light covering the throat area.
- Ideally, you want to attain a completely vertical posture with hips over your chin and feet pointing heavenward. But at first, that might not be possible and that's okay. Even a 1% improvement is 100% of 1%.
- Push the center of your back right in over your chin so that you can throw your hips in true vertical. This way the legs will rest comfortably as on a fulcrum.
- Keep very still. Do not sway about. Keep concentrating on the throat chakra. Hold this pose for as long as you are comfortable and love doing it.
- When you feel you know the pose well, then for half the time you are here, pull the toes in a downwards position towards the forehead, so that you can do a gentle stretch to the Achilles tendon and the hamstrings.
- This pose is doing a number of things. Primarily it bringing blood to the thyroid glands, secondarily it is, by sheer weight of the body, compressing each of your vertebrae, thus allowing blood to course through those areas and cleanse any toxins from your spine.
- Very slowly, to finish this exercise, let the feet be drawn towards the floor behind your head, so that you now stretch the spine allowing the toxins to be released for the spine.
- The time you do this posture is entirely up to you. You must love doing this posture and you must be comfortable. As time goes by, you can sustain this posture for long periods in total stillness and LIGHT!
As you get stronger and more flexible, you can try versions of the same pose.
Do It!
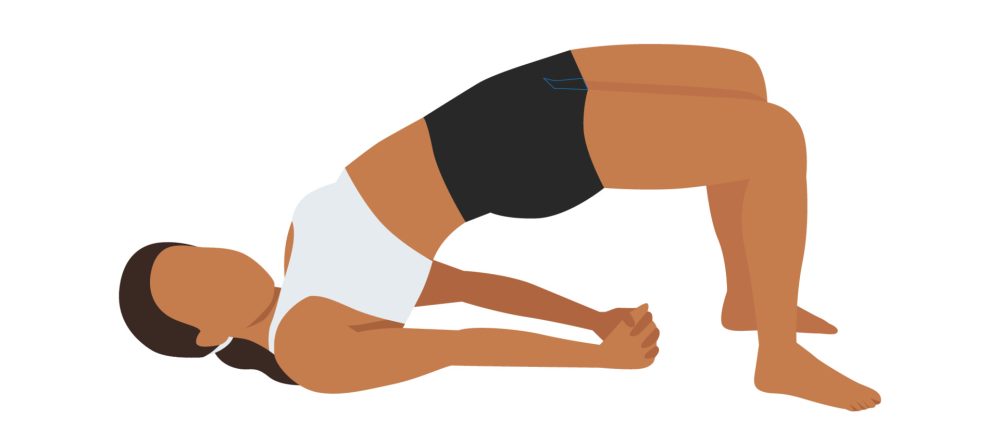
Pose 2: Sethu Bandhasana
Bridge Pose
- From the Shoulder Stand, we will transition to the bridge pose.
- While still in the shoulder stand position slowly, keep your hands on the kidney area of the back, lower the legs towards the floor and lift the pelvic region as high as possible while still remaining comfortable.
- Hold as long as you still love to do this pose.
- You may find it difficult to go directly from the shoulder stand to the bridge pose, but you should practice doing this.
- The control needed to go from the shoulder stand to the bridge pose requires intense focus which stops the mind.
- When you go into the bridge pose, bring your legs as far forward as you can hold them. Then as the lumbar region becomes more supple, the legs will fall more easily. This will help to strengthen the stomach and lower back muscles which soon will be strong enough to lower the legs all the way.
- Visualize light where the tension is greatest.
- Remember to keep the knees pointing inwards. Don't let them go outwards.
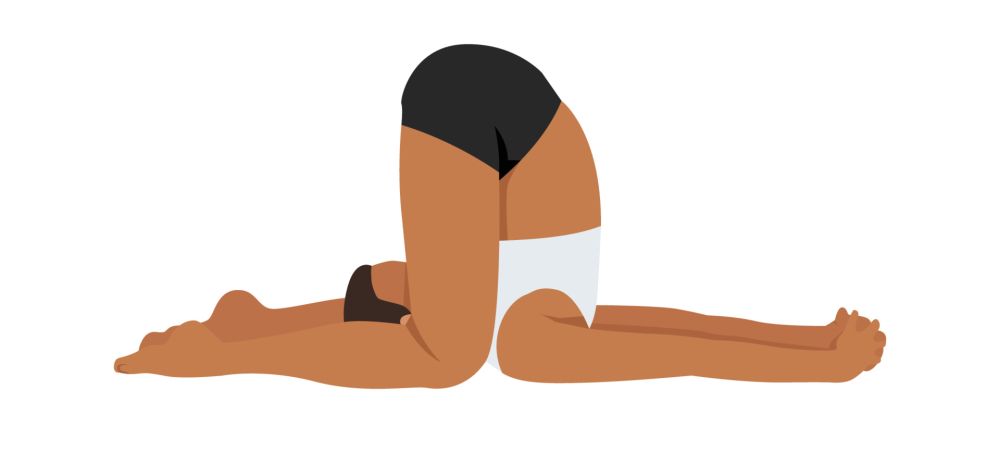
Pose 3: Karnapidasana
Knee–Ear Pose
- This pose is a more extreme stretch for your spine and it works on every chakra.
- While performing the pose visualize light along your entire spine. Breath very slowly and regularly.
- Relax. Don't worry if you can't reach the ears right away. This will come with time. When you do reach your ears, you will notice such an improvement in your flexibility.
- What you won't really notice is the most important thing. You are preparing your chakras to receive the Kundalini power residing in the coccyx center at the base of the spine.
- Kundalini is the primordial Shakti energy, which must, in Yoga be directed upwards to the
higher brain centers. The entire existence of the cosmos is brought about by Shakti (energy) and
Prakriti (matter). When these two forces are united in the Ajna center (the 6th center — that
point between the eyebrows just above the bridge of the nose, the reality of the
Spiritual Eye
becomes self evident. - I insanely love this pose!
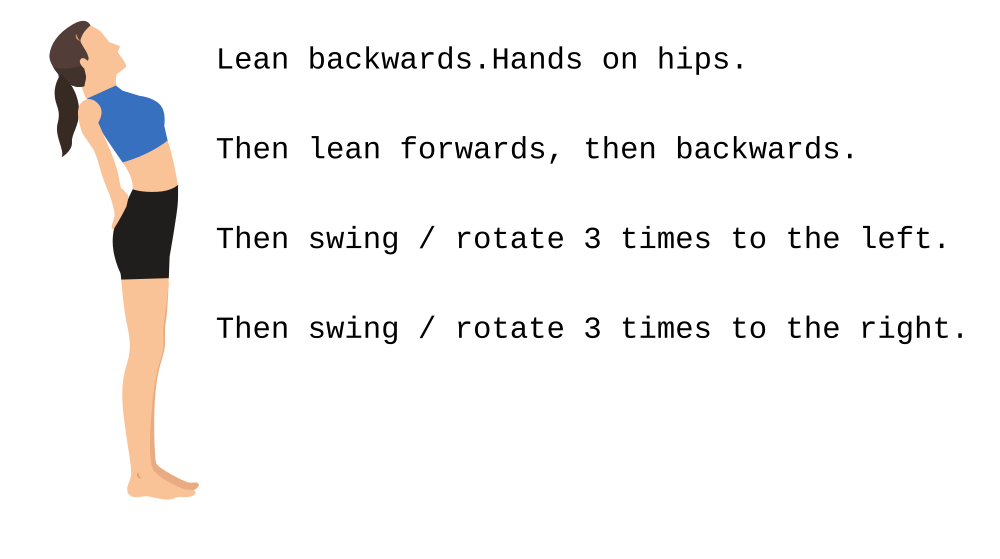
Pose 4: Swing Pose
- This is not a traditional pose and you will not find the Swing Pose anywhere else.
- Swami Harinanda was taught this pose by one of his teachers.
- To finish the knee–ear pose, one must do the reversal of it by standing with legs slightly apart and knees bent, hands on the kidney area while leaning backwards as far as one can comfortably go without falling over.
- The head must be thrown backwards as far as it will go so you can stretch the neck area. Hold that position steadily and quietly as long as you are comfortable.
- Then while keeping your hands in that position
- First learn forward
- Then go back again
- Then rotate the upper body in a full circular motion to the left 3 times.
- Then rotate to the right 3 times.
- This pose is an immediate counter pose to the knee–ear pose and works on the thoracic and lumbar regions of the spine.
- There is no official diagram or picture for this pose. Therefore, read the directions again and try to follow guide in the picture.
- Visualize light where the tension is greatest.
- Now, Do It.
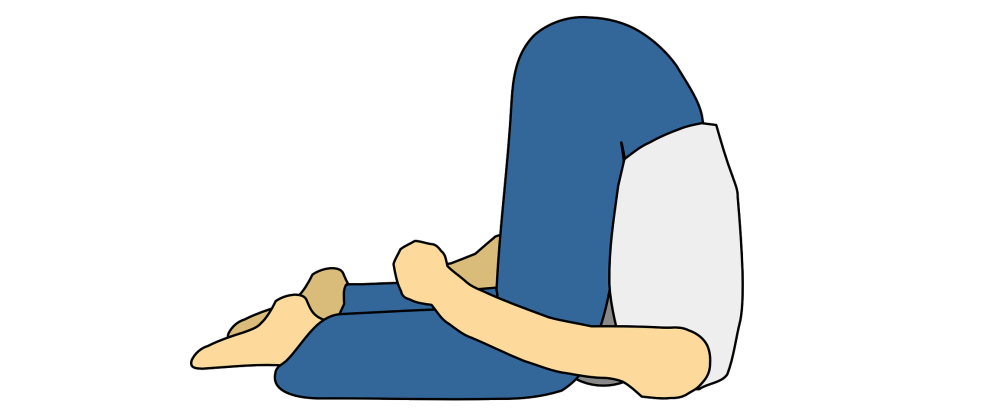
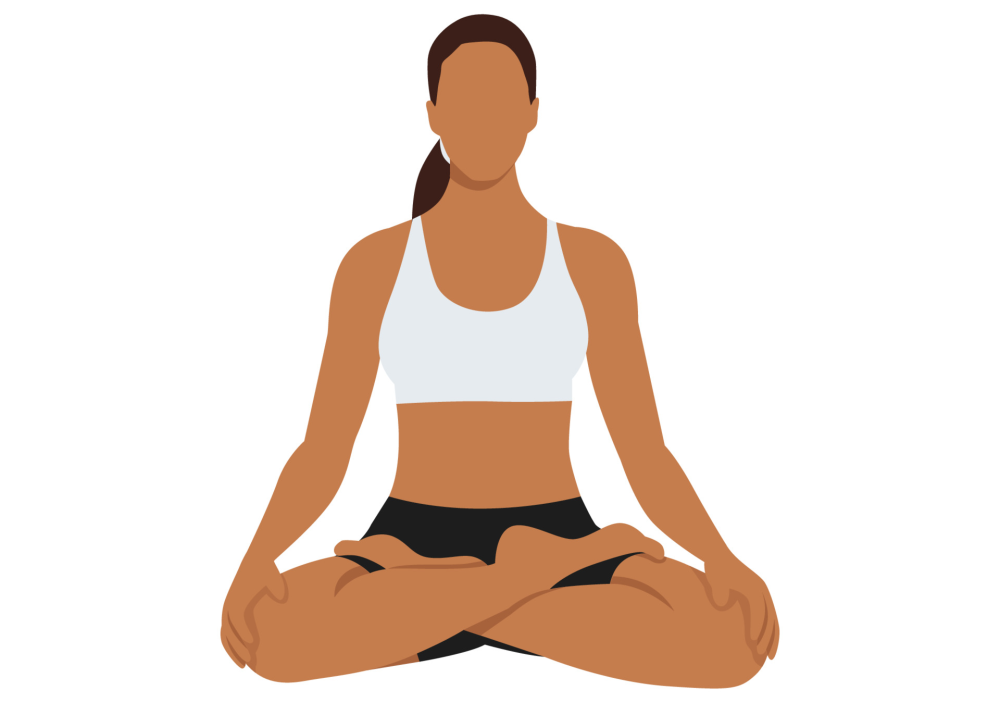
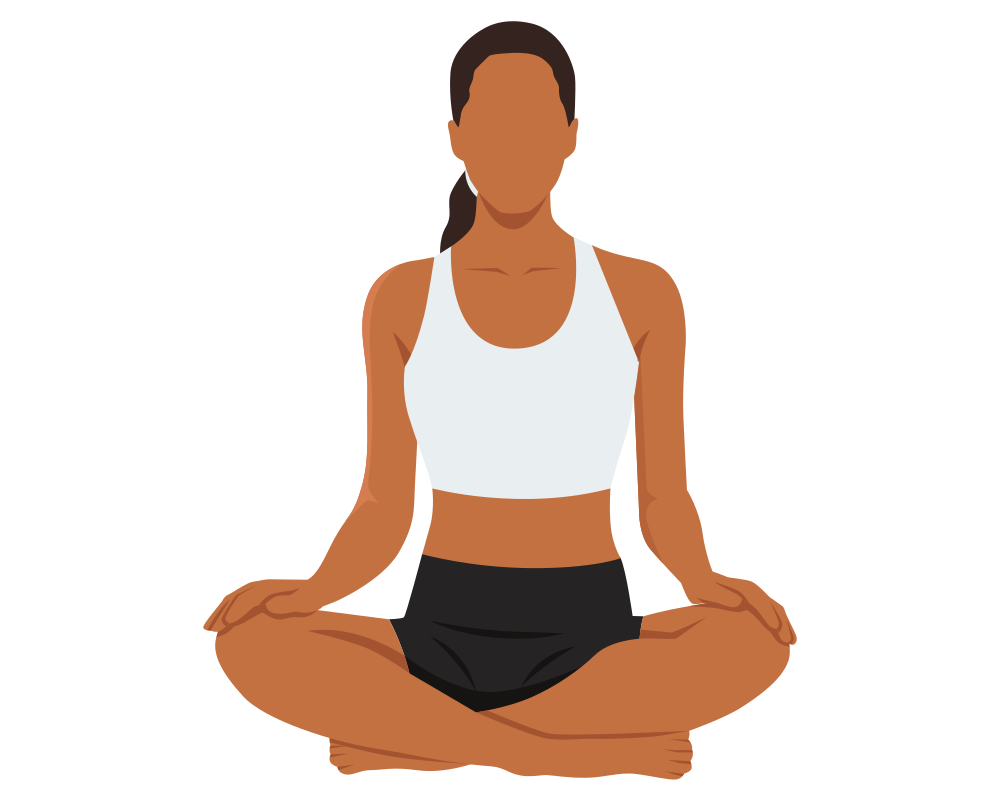
Pose 5: Padmasana
Lotus Pose
- In this pose we are going to work on the hips, knees, and ankles.
- Why is this pose so important and why do you see so many Yogis in this posture?
- It is because when one attains Samadhi, one will not fall over. This pose is perfectly balanced position for sitting.
- There are many steps to getting into this position, but you must start somewhere. So, sit with your legs outstretched and with both hands grab your right foot and pull it slowly up towards your left thigh and place it on top of the thigh, well into the groin area. Just go as far as you comfortably can.
- If possible, take hold of the other leg and pull it over the ankle of the right foot. It is important that you only go as far as you can and only sit as long as you are comfortable.
- Remember there is always your evening session that you can practice again. Soon you will be able to do the full Lotus.
- Some people who are bow legged may have difficulty, but try nonetheless, as it opens up the pelvic area and stimulates the Kundalini force in the Mulhadara (Coccyc) center.
- Visualize light over the knees, hips and ankles.
- Although you can hear the om at any time while practicing Hatha Yoga, by the time you get to this pose,
you will be tired and your mental fluctuations will be less. So take a moment and listen to the om sound
(also referred to as
the voice of God
).
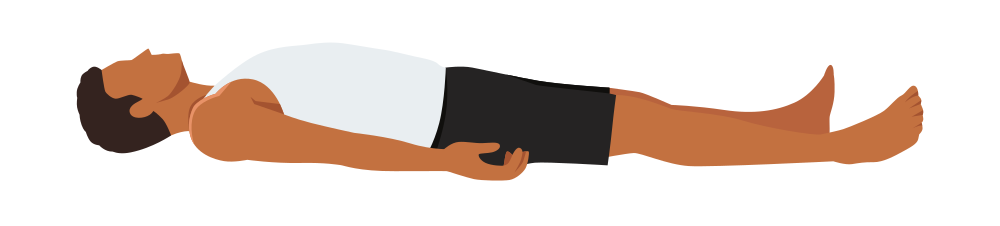
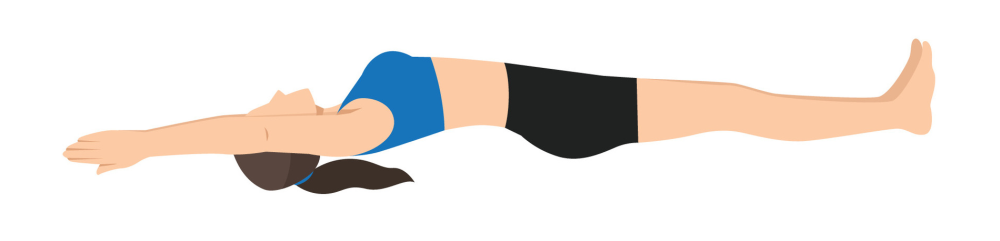
Pose 6: Shavasana
Corpse Pose or Relaxation Pose
- Always finish your Hatha Yoga with relaxation pose.
- Completion is achieved by lying prone on the floor, with hips centered on the floor.
- Shimmy the legs away from you while keeping the hips stationary. Again, shuffle back and shoulders up and away from hips. When this has been achieved, throw your arms above your head.
- Once you have finished shimmying, throw your arms above and over your head.
- This is the completion of the relaxation position.
- You will like the tremendous stretch it gives to the rib cage.
- It will also gently pulls the spine out to a full resting posture.
- The relaxation pose should be done at the end of your routine or after each pose. The choice is yours.
- In the relaxation pose, or any meditative posture, the light focus should be between the eyebrows and the middle of the forehead
- Do not be surprised if you fall asleep in this pose.
Routines
| 264 Hatha Yoga Poses (Asana)asana poses |
| Chair Hatha Yogachair seated Bitilasana and Marjariasana Cow Pose Dog Tilt Cat Tilt Ardha Matsyendrasana Half Lord of the Fishes Eka Pada Rajakapotasana Pigeon Pose Uttanasana forward bend Urdhva Hastasana extended mountain pose Utthita Parsvakonasana Extended Side Angle Pose Garudasana eagle pose Shavasana relaxation pose |
| Simple #1: Awakening The Bodyfoot massage myofascial release Bitilasana Marjariasana cow pose dog tilt cat tilt Baddha Konasana Bound Ankle Pose Butterfly Pose Cobblers Pose cobbler's pose Shavasana Corpse Relaxation |
| Simple #2: Move Into StillnessAnjaneyasana low lunge pose crescent lunge Parighasana gate pose Mrigasana deer pose Ardha Bhujangasana half cobra pose Balasana child's pose childs pose Shavasana Corpse Relaxation |
| Simple #3: Focus The MindVrksasana tree pose Virabhadrasana warrior pose Adho Mukha Svanasana downward dog half cobra pose Ardha Bhujangasana Ardha Bhujangasana knee to chest pose Shavasana relaxation pose corpse pose |
| Simple #4: Back BendingBitilasana Marjariasana cat tilt cow pose dog tilt Halasana plow pose Sarvangasana shoulder stand Sethu Bandhasana bridge pose Supta Matsyendrasana supine twist back twist Shavasana relaxation pose corpse pose |
| Simple #5: LegsSupta Baddha Konasana Reclining Bound Angle Pose Reclined Butterfly Pose Paschimottanasana Seated Forward Fold Upavistha Konasana Wide-Angle Seated Forward Bend Wide Angle Seated Forward Bend Dhanurasana bow pose Marjaryasana D Cat Pulling His Tail Pose Shavasana Corpse Pose Relaxation Pose |
| Simple #6: SeatedBaddha Konasana Bound Angle Pose Virasana hero pose Malasana garland pose Parivrtta Janu Sirsasana Revolved Head To Knee Pose Sukhasana easy pose Shavasana Corpse Pose Relaxation Pose |
| Simple #7: Standing PosesUtthita Tadasana five start pointed pose Anuvittasana standing backbend pose Urdhva Hastasana extended mountain Katichakrasana standing spinal twist Parshvottanasana pyramid pose Vineeta Rajahamsasana humble flamingo pose Utthita Ardha Dhanurasana Standing Half Bow Pose Uttanasana standing forward Shavasana Corpse Pose Relaxation Pose |
| Simple #8: Gentle But GoodAnjaneyasana crescent moon pose low lunge pose Upavistha Konasana Wide–Angled Seated Forward Bend Salamba Bhujangasana sphinx pose Parivrtta Sukhasana Easy Twist Pose Sasangasana Rabbit Pose Shavasana Corpse Pose Relaxation Pose |
| Long Routine: Challenging But DoableBitilasana Marjariasana Cow Dog Cat Tilt Uttana Shishosana Extended Puppy Baddha Konasana Bound Ankle Butterfly Pose Cobblers Pose Cobbler's Pose Matsyasana Fish Janu Sirsasana Paschimottanasana Seated Forward Bhujangasana Cobra Adho Mukha Svanasana Downward Dog Supta Matsyendrasana Spinal Twist Supine Twist Ardha Matsyendrasana Half Lord of the Fishes Ustrasana Camel Apanasana Knees to Chest Setu Bandhasana Half Bridge Balasana Child's pose Childs pose Padmasana Lotus Shavasana Corpse Relaxation |
| Lesson 1 (Novice)Sarvangasana shoulder stand Sethu Bandhasana Bridge Karnapidasana Knee Ear Swing Padmasana Lotus Shavasana Corpse Relaxation |
| Lesson 2 (Intermediate)Pawanmuktasana Wind Expelling Paschimottanasana Seated Forward Fold Kurmasana Tortoise Setu Bandhasana Half Bridge Shavasana Corpse Relaxation |
| Lesson 3 (Intermediate)Yogic Vibration Ardha Matsyendrasana Half Lord of the Fishes Marichyasana Sage Marichi's Pose Mayoorasana Peacock Kakasana Crow Sirsasana Headstand Shavasana Corpse Relaxation |
| Lesson 4 (Advanced)Bhujangasana Cobra Bhujangasana Advanced Cobra Ardha Salabhasana Half Locust Poorna Salabhasana Full Locust Arms At Back Locust Final Locust Pose Shavasana Corpse Relaxation |
| Lesson 5 (Advanced)Poorna Dhanurasana Full Bow Eka Pada Dhanurasana Single Leg Bow Laghu Vajrasana Little Thunderbolt Supta Vajrasana Reclined Thunderbolt Supta Vajrasana Diamond Eka Pada Rajakapotasana King Pigeon Pincha Mayurasana Feathered Peacock Vrishikisana Scorpion Shavasana Corpse Relaxation |
License
Articles by Swami Harinanda and Yogi Karmananda are © 2026 and are licensed under CC BY-NC-ND 4.0![]()
![]()
![]()
![]()
Most images do not qualify for use under this license. The 9 Planes of Reality
image is, however our own
image and thus qualifies.
Some images are used under a Creative Commons License and can also be used as long as you follow their license agreement.
Music has been used with permission and may be used if you qualify and abide by the licensing requirements.
The Real Yoga
website is designed to be a self–study website. But, feel free
to send us a message — but do make sure your email is correct.